 |
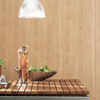
1.MEASURING
Any really successful interior begins with proper
preparation: the better you prepare, the better the
end result will be! So, before you even think of buying
anything, take careful measurements of the walls and
ceilings you want to cover. Deceuninck Decor is available
in 3 lengths: 2.7m, 4.5m and 6m.
|
 |
2.BASIC TOOLS
The basic tools you will need for this job are: a
tenon saw, a stanley knife, a staple gun or nail gun,
a drill, a screwdriver and a folding measure or tape.
Open the packaging carefully to avoid damaging profiles.
Open the back of the pack and make sure that you read
the insert carefully.
|
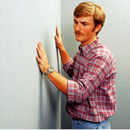 |
3.FLAT SURFACES
Anyone with good DIY skills is unlikely to have problems
fitting cladding profiles. The cladding is fixed to
battens attached to the wall and/or ceiling, so it
is vital that these surfaces are as flat as possible.
|
 |
4.MOUNTING BATTEN
By this point, you will already have taken accurate
measurements of the cladding profiles. Now, use the
tenon saw to cut your plastic or timber mounting battens
to the required length. The advantage of plastic battens
is that they are easy to work with and will last for
ever.
|
 |
5.SPACING
Cladding profiles can be fixed horizontally, vertically
or diagonally, so if you decide to have yours horizontal,
then you need to fix your battens vertically. Naturally,
if you decide on vertical cladding, you’ll have
to fix your battens horizontally. Whichever you choose,
you should screw fix all the mounting battens at 30
cm centres.
|
 |
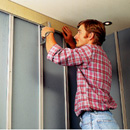
6.STARTING- OR CORNER PROFILES
Once all the battens are firmly screwed in place,
you can saw your starting or corner profiles to the
required lengths. Use a staple gun or nail gun to
attach them to the battens.
|
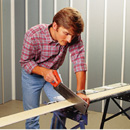 |
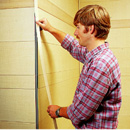
7.SAWING THE PANELS
With all the profiles fixed firmly to the battens,
you can start to attach the panels by sawing your
wall panelling to the right length.
|
 |
8. FIXING THE PANELS
The panels are fixed simply by nailing or stapling.
Always panel with the tongue uppermost and use flat-headed
nails (at least 27 mm long) or 14 mm staples.
|
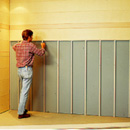 |
9.TONGUE AND GROOVE
The tongue-and-groove principle means that you can
simply slide all the other panels into place before
fixing them in exactly the same way as the first.
Make sure that you fit every panel carefully and as
closely to the next as possible. You’ll get
the best results if you always start from the top
and work down.
|
 |
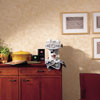
10.CUT-OUTS
Because Decor is so easy to use, even the trickiest
jobs are simple to do. For example, using plastic
cladding makes it easy to work around waste pipes
and even fitting around a power socket takes no time
at all with the help of your electric drill.
|
 |
11.CLIP-ON FINISHES
Once you have completely finished cladding your wall
or ceiling, you can finish the job using starting
or corner profiles and decorative strips. These simply
clip onto the profile beneath.
|
 |
12.CONNECTOR PROFILE
If even the longest length of Decor
profile isn’t long enough to clad your wall
or ceiling in a single run, you can join profiles
together using the P 112 connector profile, which
also simply clips into place. Once you have fitted
the basic profile and cladding to the battens, you
can finish the job using this clip-on part.
|